ご利用ガイド オブジェクトストレージを使う(GitLab編)
目次
ConoHaのオブジェクトストレージを使って、GitLabと連携する方法をご紹介します。
今回はConoHaで提供しているGitLabのテンプレートを使用していきます。
「バックアップの取得・リストア」「GitLab Container Registry」の2つをご紹介します。
バックアップの取得・リストア
バックアップをオブジェクトストレージに保存する設定にしておくことでデータの移行の際に使えたり容量の節約になります。
詳細なバックアップの方法はBacking up and restoring GitLabをご確認ください。
$ cat << EOF >> /etc/gitlab/gitlab.rb
gitlab_rails['backup_upload_connection'] = {
  'provider' => 'OpenStack',
  'openstack_auth_url' => 'https://identity.tyo1.conoha.io/v2.0/',
  'openstack_username' => 'gncuxxxxxxxx',
  'openstack_api_key' => '',
  'openstack_tenant' => 'gnctxxxxxxxx',
}
gitlab_rails['backup_upload_remote_directory'] = 'gitlab_backup'
EOF
$ gitlab-ctl reconfigure| 項目 | 値 | 説明 |
|---|---|---|
| provider | OpenStack | |
| openstack_auth_url | identityのURL | 好きなaccess_keyを設定可能 |
| openstack_username | APIユーザー名 | |
| openstack_api_key | APIパスワード | |
| openstack_tenant | テナント名 | |
| backup_upload_remote_directory | コンテナ名 | 事前に作成しておく必要があります |
※「identityのURL」「APIユーザー名」「APIパスワード」「テナント名」等API情報の確認方法および、APIトークンの取得については以下のガイドをご確認ください。
バックアップは以下のコマンドで取得する事ができます。
$ gitlab-rake gitlab:backup:createオブジェクトストレージの指定したコンテナにバックアップが保存されていることが確認できます。

リストアは以下のコマンドで実行する事ができます。
$ gitlab-rake gitlab:backup:restoreリストアの際に以下のように表示された場合は「BACKUP」という変数を指定することでリストアができます。
複数のバックアップが存在している場合に表示されます。
$ rm -f /var/opt/gitlab/backups/*
$ gitlab-rake gitlab:backup:restore
No backups found in /var/opt/gitlab/backups
Please make sure that file name ends with _gitlab_backup.tar

$ swift list gitlab_backup
1545270518_2018_12_20_11.2.3_gitlab_backup.tar
1545270666_2018_12_20_11.2.3_gitlab_backup.tar
$ swift download gitlab_backup 1545270666_2018_12_20_11.2.3_gitlab_backup.tar
$ mv 1545270666_2018_12_20_11.2.3_gitlab_backup.tar /var/opt/gitlab/backups/
バックアップはオブジェクトストレージに保存されるようになりましたが、以下のディレクトリに元のバックアップが残っています。不要な場合は削除し、リストアしたいときにダウンロードしてリストアするのがオススメです。
ダウンロードの方法等はswiftコマンド編#オブジェクトの保存、取得等をご参考にしてください。
/var/opt/gitlab/backups$ rm -f /var/opt/gitlab/backups/*
$ gitlab-rake gitlab:backup:restore
No backups found in /var/opt/gitlab/backups
Please make sure that file name ends with _gitlab_backup.tar
$ swift list gitlab_backup
1545270518_2018_12_20_11.2.3_gitlab_backup.tar
1545270666_2018_12_20_11.2.3_gitlab_backup.tar
$ swift download gitlab_backup 1545270666_2018_12_20_11.2.3_gitlab_backup.tar
$ mv 1545270666_2018_12_20_11.2.3_gitlab_backup.tar /var/opt/gitlab/backups/GitLab Container Registry
GitLab Container Registryという機能を有効にすることでGitLabとDockerを連携させて利用したり、CIとも組み合わせることができます。
詳細についてはGitLab Container Registryをご確認ください。
必要な設定としては以下になります。独自ドメインと書かれている箇所は適宜置き換えてください。
2. 独自ドメインの設定
3. 証明書の設定
4. DockerRegistryの設定
5. オブジェクトストレージの設定
1. Dockerのインストール
$ yum install -y yum-utils
  device-mapper-persistent-data
  lvm2
$ yum-config-manager
    --add-repo
    https://download.docker.com/linux/centos/docker-ce.repo
$ yum install docker-ce -y

$ systemctl enable docker --now
2. 独自ドメインの設定
/etc/gitlab/gitlab.rbにexternal_urlという項目があるので独自ドメインに書き換えます。
$ sed -i "s/^external_url 'http://gitlab.example.com'/external_url 'http://独自ドメイン'/" /etc/gitlab/gitlab.rb
$ gitlab-ctl reconfigure
正しく設定されているとリポジトリのURLの箇所が変わっています。
3. 証明書の設定
$ yum install certbot certbot-nginx -y
$ systemctl stop gitlab-runsvdir.service
$ certbot certonly --standalone -d 独自ドメイン -m メールアドレス --agree-tos -n/etc/gitlab/gitlab.rbのexternal_urlをhttpsに書き換えます。
$ sed -i "s/^external_url 'http://独自ドメイン'/external_url 'https://独自ドメイン'/" /etc/gitlab/gitlab.rb$ firewall-cmd --add-service=https --zone=public --permanent
$ firewall-cmd --reload
$ cat << EOF >> /etc/gitlab/gitlab.rb
nginx['redirect_http_to_https'] = true
nginx['ssl_certificate'] = "/etc/letsencrypt/live/独自ドメイン/fullchain.pem"
nginx['ssl_certificate_key'] = "/etc/letsencrypt/live/独自ドメイン/privkey.pem"
EOF
$ systemctl start gitlab-runsvdir.service
$ gitlab-ctl reconfigure #ブラウザでアクセス確認できてから(502ではない状態)正しく設定されているとhttpsに変わっています。
4. DockerRegistryの設定
$ firewall-cmd --add-port=5500/tcp --zone=public --permanent
$ firewall-cmd --reload
$ cat << EOF >> /etc/gitlab/gitlab.rb
registry_external_url 'https://独自ドメイン:5500'
registry['enable'] = true
registry_nginx['ssl_certificate'] = "/etc/letsencrypt/live/独自ドメイン/fullchain.pem"
registry_nginx['ssl_certificate_key'] = "/etc/letsencrypt/live/独自ドメイン/privkey.pem"
EOF
$ gitlab-ctl reconfigure
GitLabのユーザー名とパスワードでログインできることを確認します。
$ docker login gg.hxa.me:5500
Username: *****
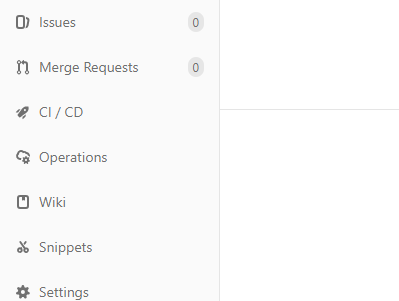
Password: *****ここまで正しく設定ができていれば以下のように表示されています。
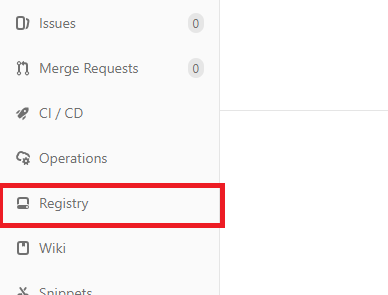
「Registry」が表示されていない場合は設定を見直してください。
5. オブジェクトストレージの設定
$ cat << EOF >> /etc/gitlab/gitlab.rb
registry['storage'] = {
  'swift' => {
    'authurl' => 'https://identity.tyo1.conoha.io/v2.0',
    'username' => 'gncuxxxxxxxx',
    'password' => '',
    'tenant' => 'gnctxxxxxxxx',
    'container' => 'image_container'
  }
}
registry['health_storagedriver_enabled'] = false
EOF
$ gitlab-ctl reconfigure| 項目 | 値 |
|---|---|
| authurl | identityのURL |
| username | APIユーザー名 |
| password | APIパスワード |
| tenant | テナント名 |
| container | コンテナ名 |
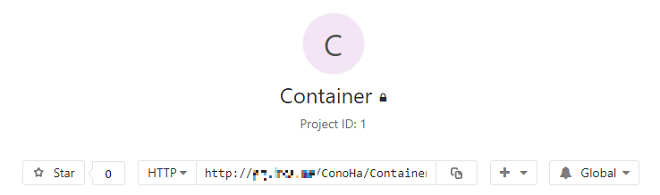
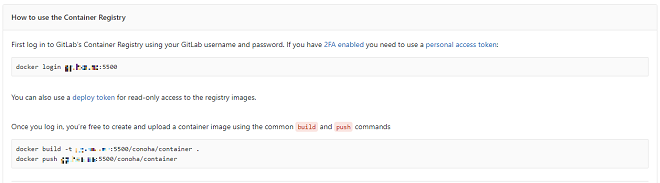
6. 実際の画面で確認
さきほどの「Registry」を開くと以下のような画面が表示されます。イメージにタグ付けを行ってpushをすることでGitLabの画面上で確認することができます。
$ cat << EOF > Dockerfile
FROM alpine:latest
EOF
$ docker build . -t 独自ドメイン:5500/conoha/container
$ docker images
REPOSITORY TAG IMAGE ID CREATED SIZE
alpine latest 196d12cf6ab1 3 months ago 4.41MB
独自ドメイン:5500/conoha/container latest 196d12cf6ab1 3 months ago 4.41MB
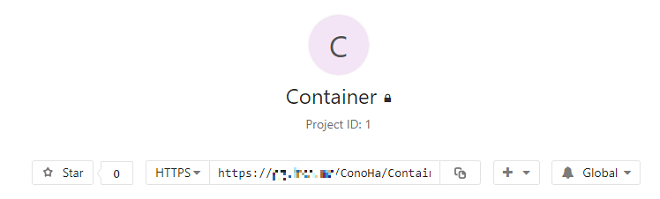
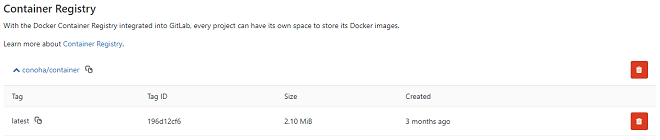
$ docker push 独自ドメイン:5500/conoha/containerpushまで完了すると以下のように表示されます。
おわりに
今回は「バックアップの取得・リストア」「GitLab Container Registry」の2つをご紹介しました。
バックアップはcron等で定期的に取得しておくことで不慮の事態に備えることができます。
Container RegistryはCIと組み合わせることでMerge Requestをトリガーにイメージを作成してデプロイ等も可能です。
- 問題は解決できましたか?
-
お役立ち情報
ConoHaではサポートコンテンツの他にも以下のようなお役立ち情報をご用意しております。ぜひご活用ください。