ご利用ガイド 自動バックアップを設定する
目次
自動バックアップは週に一回取得され、最大3世代まで管理できます。 保存されたバックアップは、コピーを作成したり、不要なものは削除することができます。
さらに、バックアップからサーバーの再構築を行ったり、バックアップをイメージとして保存し、それをベースに新しいサーバーの作成をするといった柔軟な活用も可能です。
※ 512MBプランでは自動バックアップ機能をご利用いただけません。
※ 自動バックアップは有料オプションです。料金につきましてはこちらをご確認ください。
自動バックアップを有効にする
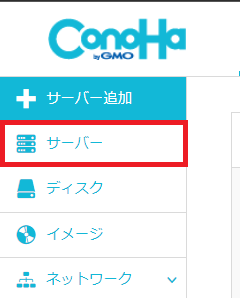
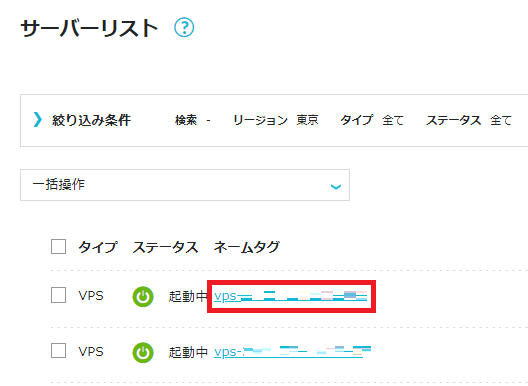
[1] コントロールパネル左メニューの「サーバー」をクリックします。
[2] サーバーリストを確認し、対象のVPSのネームタグをクリックします。
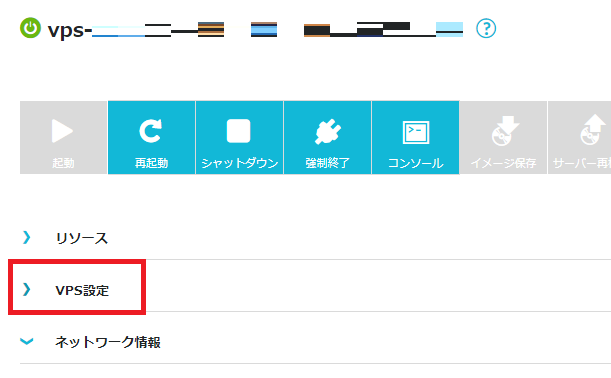
[3] 「VPS設定」をクリックします。
[4] 自動バックアップの「有効」をクリックします。
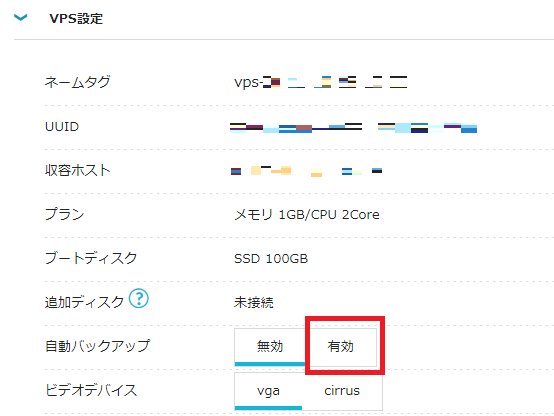
※追加ディスクをご利用の場合、ディスク容量に応じ金額も異なりますので、ご留意ください。
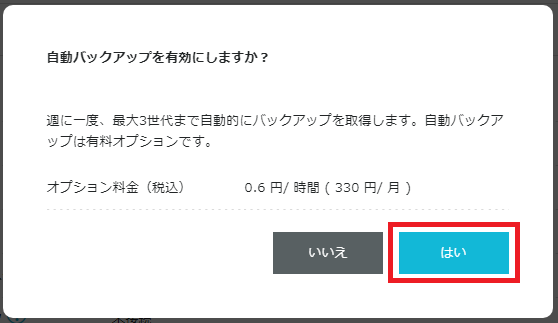
[5] ポップアップが表示されるので、内容を確認の上、「はい」をクリックします。
自動バックアップを無効にする
[1] コントロールパネル左メニューの「サーバー」をクリックします。
[2] サーバーリストを確認し、対象のVPSのネームタグをクリックします。
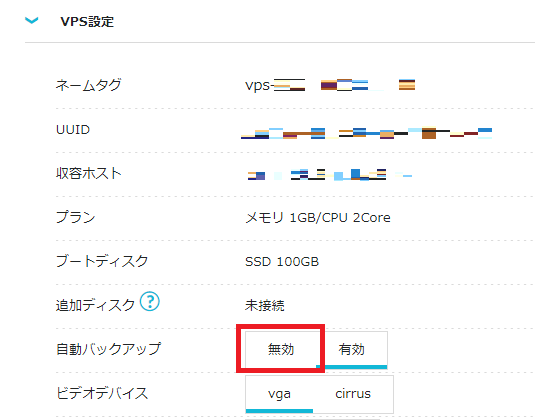
[3] 「VPS設定」をクリックします。
[4] 自動バックアップの「無効」をクリックします。
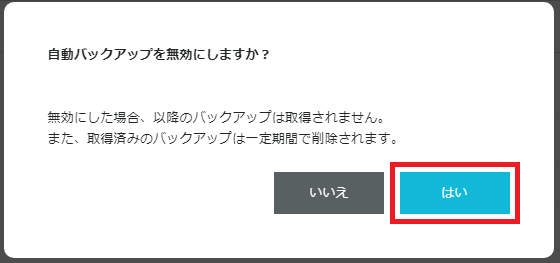
[5] ポップアップが表示されるので、内容を確認の上、「はい」をクリックします。
自動バックアップからのイメージ作成方法
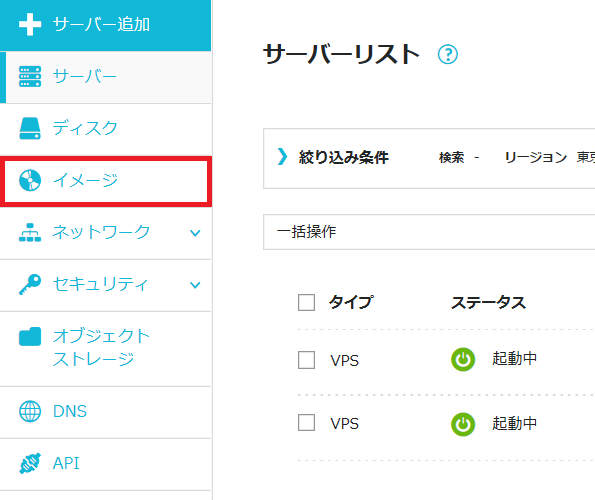
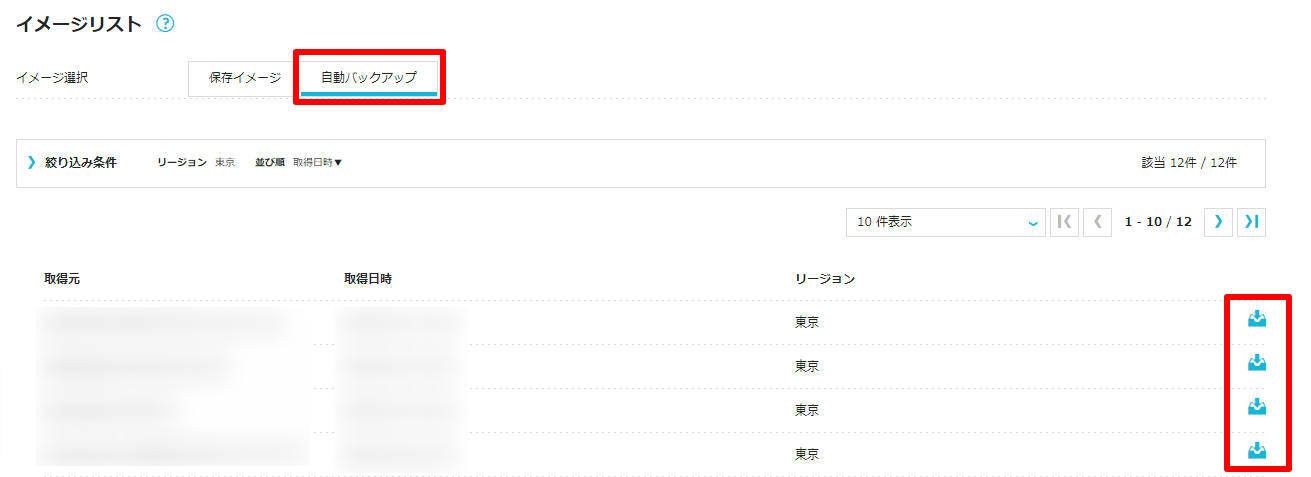
[1] メニューから「イメージ」を選択します。
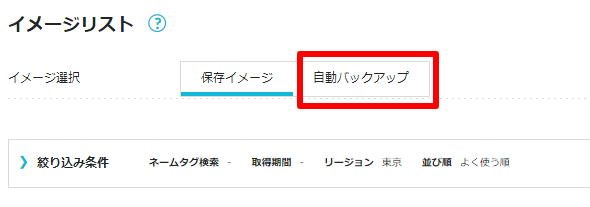
[2] イメージ選択より「自動バックアップ」を選択します。
[3] 各イメージ名が表示されている右側のボタンをクリックします。
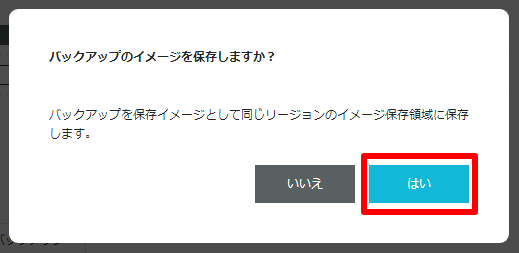
[4] 次画面にて「はい」を選択します。
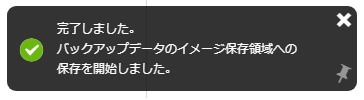
[5] 画面左下に以下の表示されます。
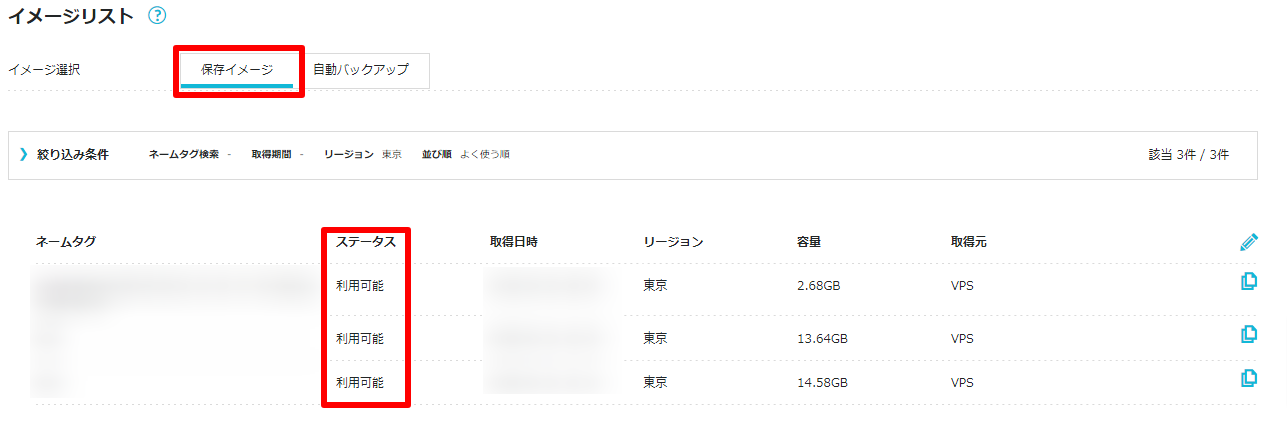
[6] 「保存イメージ」を選択し、ステータスが「保存中」から「利用可能」になりましたら完了となります。
自動バックアップからVPSのリストア方法
自動バックアップからのサーバー再構築につきましてはこちらをご確認ください。
なお、追加ディスクにつきましてはサーバー再構築時には選択が出来ないため、イメージ保存機能を使用した追加ディスクの再作成が必要となります。詳細につきましては、こちらをご確認ください。
- 問題は解決できましたか?
-
お役立ち情報
ConoHaではサポートコンテンツの他にも以下のようなお役立ち情報をご用意しております。ぜひご活用ください。